I'm still printing out the other pieces, this one uses peach containers, oranges, pairs... I call it peach because those are the sweetest, ah i gotta trim the one side on the clamp, look how it covers the slot, now the threaded rod won't go, back to the CAD, Slicer, printer.
PEACHES!
Right now i'm dual extrusion printing the container clamps
Mounted, don't mind the warping of the part it still works
Peaches and Pudding!
Somethings up with the first layer
Lets take a closer look, what the world is going on
Made it this far, time to install the hex nuts
Time to print over the hex nuts
Alright completed print
Look at that bling
Saturday, December 31, 2016
Friday, December 30, 2016
Printing tall parts with grip
See that connection to the build plate, it makes it stronger so the part doesn't fall over as its printing, and its easy to remove after printing, its not needed for all parts, only the ones that need more surface area.
3D Printing over hex nuts to trap them inside the part
Here is the first half of the print, the printer stops, i install the hex nuts then start the second program to print over the hex nuts.
Here is the finished part, if you look closely you can see the hex nut inside the part, unable to fall out, making it easier to assemble
Here is the finished part, if you look closely you can see the hex nut inside the part, unable to fall out, making it easier to assemble
Large print to check flatness
8" x 8"
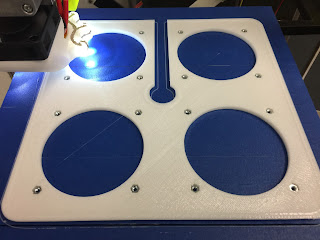
Wanted to make a large print on my RepRap 3D Printer, before i make it i'm going to save allot of time by checking flatness and calibrating the printer so hopefully the part i make prints right the first time.
Its only one layer thick and two lines wide, it basically covers every part of the build plate.
This is the second calibration print, the first one barely stuck, so i went from 100% first layer width to 150% first layer width, and this print stuck way better, there is a slight high point in the center of the build plate and four low points in the corners, so i can only print to the correct thickness in the center of the build plate and then towards the edges the nozzle gap starts to increase causing the filament to not want to stick, so i found that increasing the first layer width to a higher % helps solve this problem, i'm using Simplify3D to adjust this setting.
This is my second blog and wanted to put more blogs to add more to the blog to get things started, so who knows whats next, 3D print stuff most likely
My First Blog, 3D printing is the topic
My First Blog
3D Print downloaded from thingiverse and printed on prototype dual extrusion 3D printer i'm working on.
3D Print downloaded from thingiverse and printed on prototype dual extrusion 3D printer i'm working on.
Subscribe to:
Comments (Atom)


